Brother LS2125i Sewing Machine Manual: A Comprehensive Guide
This manual provides detailed instructions for the Brother LS2125i, covering setup, operation, maintenance, and troubleshooting․ Digital PDF versions are readily available online, alongside parts lists and accessory information․
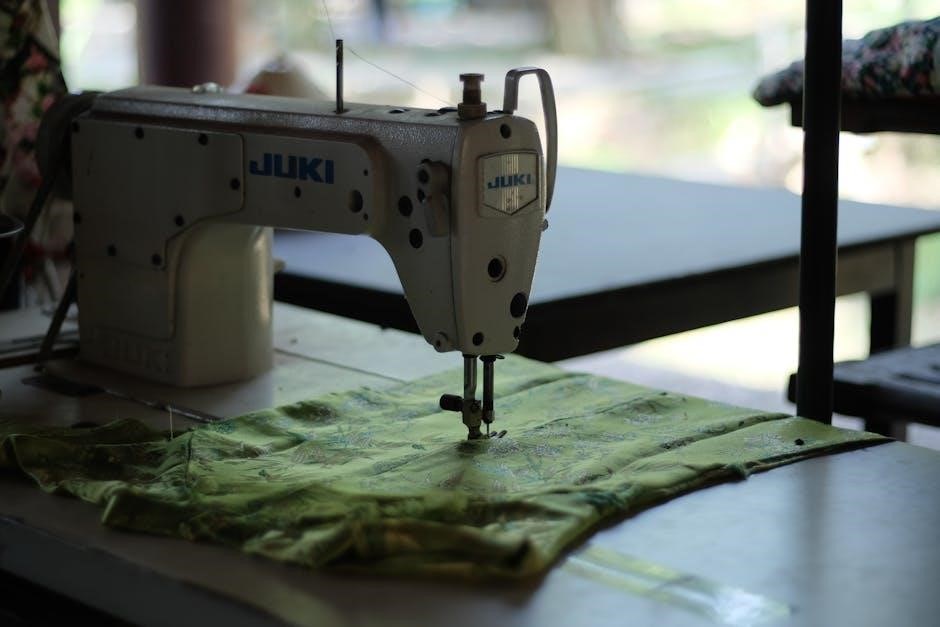
The Brother LS2125i is a popular, lightweight, and user-friendly sewing machine, ideal for both beginners and experienced sewists․ This machine offers a balance of affordability and functionality, making it a great choice for a wide range of sewing projects․ It’s designed for domestic use and is capable of handling various fabrics, from lightweight cotton to denim․
This comprehensive guide will walk you through every aspect of using your LS2125i, from initial setup and threading to mastering basic and advanced sewing techniques․ You’ll find detailed instructions, helpful tips, and troubleshooting advice to ensure a smooth and enjoyable sewing experience․ Digital manuals, often in PDF format, are easily accessible online, supplementing the printed manual included with your machine․ Understanding your machine’s capabilities and following the guidelines in this manual will unlock its full potential, allowing you to create beautiful and lasting projects․
Machine Features and Specifications
The Brother LS2125i boasts a range of features designed for convenience and versatility․ It includes 19 built-in stitches, offering options for various sewing applications, including straight stitch, zigzag, and buttonhole functions․ The machine features an automatic needle threader, simplifying a traditionally tedious task․ Adjustable stitch length and width provide customization for different fabrics and project requirements․
Key specifications include a lightweight design for portability, making it easy to store and transport․ It operates on standard household electrical power․ The free arm allows for easy sewing of cuffs, sleeves, and other cylindrical items․ Accessories typically include several presser feet, a seam ripper, and a set of needles․ Refer to your manual for a complete list of included items and optional accessories available for purchase․ The machine is designed for ease of use and reliable performance․
Unboxing and Initial Setup
Upon unboxing your Brother LS2125i, carefully remove all packaging materials․ Verify that all included accessories are present, referencing the parts list in your manual․ Inspect the machine for any visible damage that may have occurred during shipping․ Place the sewing machine on a stable, flat surface with adequate lighting․
Initial setup involves attaching the power cord and ensuring the machine is switched off․ Install the bobbin case and bobbin, following the threading diagram in the manual․ Attach the presser foot․ Before sewing, familiarize yourself with the machine’s controls, including the power switch, stitch selection dial, and foot pedal․ Download the digital manual (PDF) for detailed visual guidance if needed․ A quick reference guide is also often included for immediate assistance․
Getting Started with Your Machine
Begin by correctly threading the upper thread and bobbin, then selecting your desired stitch using the stitch selection dial․ Practice on scrap fabric first!
Threading the Machine: Upper Thread
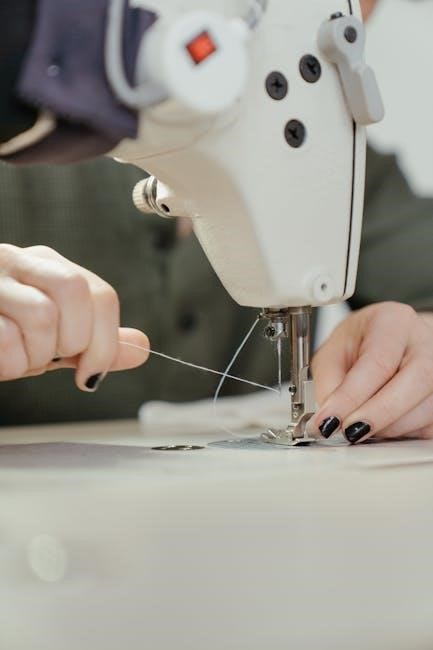
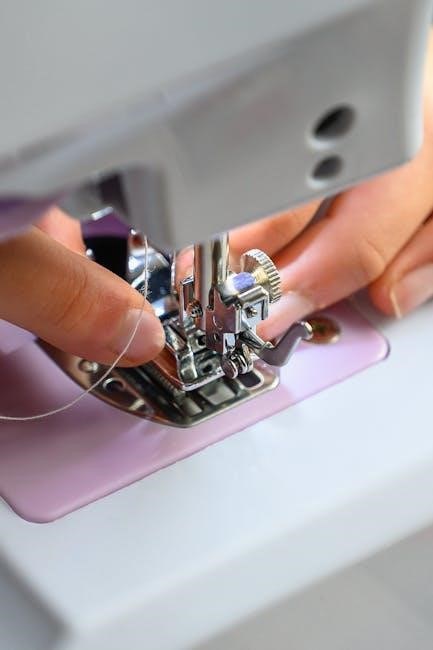
Proper upper threading is crucial for successful sewing with your Brother LS2125i․ Begin by ensuring the machine is turned off․ Raise the presser foot; this opens the tension discs, allowing the thread to seat correctly․ Place the spool of thread on the spool pin․
Next, guide the thread through the first thread guide, then down and around the tension disc assembly․ Continue threading through the take-up lever – ensure the thread is securely inserted into the lever’s slot․ From the take-up lever, thread down through the second thread guide․
Finally, thread the needle from front to back․ A needle threader can be helpful! Double-check that the thread is fully inserted into the needle’s eye․ Pull a few inches of thread through the needle․ Incorrect threading can cause skipped stitches or tension problems, so refer to the manual’s diagrams for visual guidance․
Threading the Machine: Bobbin Winding and Insertion
Winding the bobbin correctly is essential for even stitching․ Place the spool of thread on the spool pin and guide the thread through the bobbin winding tension disc․ Then, thread the end of the thread through a hole in the bobbin, and place the bobbin onto the bobbin winder spindle․
Push the bobbin winder to the right and press the foot pedal gently to start winding․ Once full, the winder will automatically stop․ Trim the thread․ To insert the bobbin, open the bobbin cover․
Place the bobbin into the bobbin case, ensuring the thread unwinds in the correct direction (usually counter-clockwise)․ Guide the thread through the tension spring and then through the slot in the needle plate․ Pull up a few inches of thread․
Selecting the Stitch: Stitch Selection Dial
The stitch selection dial on your Brother LS2125i allows you to choose from a variety of stitch patterns․ Rotate the dial to align the desired stitch number with the indicator mark․ Common stitches include straight stitch, zigzag stitch, and several decorative options․
Each stitch number corresponds to a specific stitch width and length setting, which can be further adjusted using the corresponding dials․ Refer to the stitch chart in your manual to understand the purpose and recommended settings for each stitch․
Experiment with different stitches on scrap fabric to familiarize yourself with their appearance and suitability for various projects․ Remember to adjust the stitch length and width as needed for optimal results․

Basic Sewing Operations
Mastering fundamental techniques like straight and zigzag stitching is crucial․ Adjust stitch length and width for diverse fabrics and project needs, ensuring quality results․
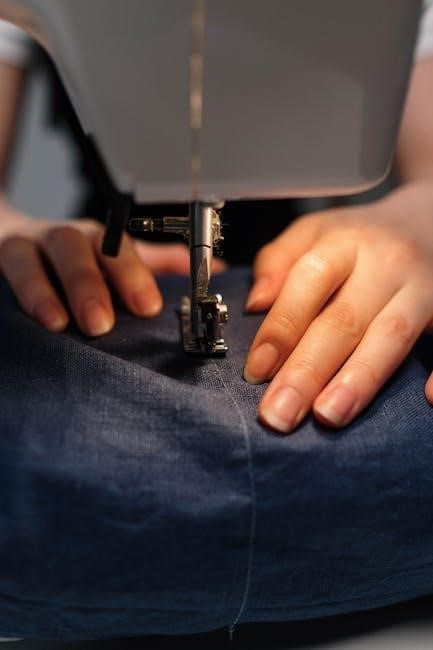
Straight Stitching: Techniques and Adjustments
The Brother LS2125i’s straight stitch is your workhorse for seams, topstitching, and basting․ Begin by selecting the straight stitch option on the stitch selection dial․ Ensure proper threading – both upper and bobbin – as incorrect threading leads to inconsistent stitches․ Practice on scrap fabric to determine the optimal stitch length for your material; a shorter stitch is ideal for delicate fabrics, while a longer stitch suits heavier materials․

Consistent seam allowance is key․ Utilize the markings on the needle plate as a guide․ For precise topstitching, consider using a specialized presser foot․ Adjusting stitch length impacts the seam’s strength and appearance․ A longer stitch creates a looser seam, suitable for gathering, while a shorter stitch provides a more durable and refined finish․ Regularly check the tension to avoid puckering or loose stitches․ Experiment with different settings to achieve a balanced stitch on various fabric weights․
Zigzag Stitching: Applications and Settings
The Brother LS2125i’s zigzag stitch offers versatility beyond basic seams․ It’s ideal for finishing raw edges to prevent fraying, creating decorative elements, and sewing stretch fabrics․ Select the zigzag stitch on the dial and experiment with stitch width and length․ A narrower width is suitable for reinforcing edges, while a wider width creates bolder decorative patterns․
Adjusting stitch length impacts the density of the zigzag․ Shorter lengths are best for tight curves and delicate fabrics, while longer lengths work well on heavier materials․ Utilize different settings for various applications – a tight zigzag for stretch fabrics, a wider zigzag for decorative stitching, and a medium setting for edge finishing․ Test on scrap fabric to determine the optimal settings for your chosen material․ Remember to adjust the tension if needed to achieve a balanced stitch, avoiding puckering or looping;
Adjusting Stitch Length and Width
The Brother LS2125i allows precise control over stitch length and width, crucial for adapting to different fabrics and project needs․ Stitch length is adjusted using a dial, typically measured in millimeters․ Shorter stitch lengths (e․g․, 1․5mm) are ideal for delicate fabrics and intricate details, providing greater durability․ Longer stitch lengths (e․g․, 3mm) are suitable for basting or heavier materials, offering faster sewing․
Stitch width, also controlled by a dial, determines the breadth of stitches like zigzag․ Narrow widths reinforce edges, while wider widths create decorative effects․ Experiment with settings on scrap fabric before starting your project․ Incorrect settings can cause puckering or thread breakage․ Always refer to the manual for recommended settings based on fabric type․ Proper adjustment ensures clean, professional-looking results and prevents damage to your machine or materials․
Advanced Features and Techniques
Explore buttonholes, zipper insertion, and optional presser feet to unlock the full potential of your Brother LS2125i sewing machine․
Buttonhole Sewing: Step-by-Step Instructions
Creating buttonholes with the Brother LS2125i involves a few key steps․ First, attach the buttonhole foot․ Select the buttonhole stitch on the stitch selection dial – typically a designated buttonhole setting․
Next, measure the button you’ll be using and adjust the buttonhole length accordingly using the length adjustment dial․ Place the buttonhole stabilizer (if using) behind the fabric․ Carefully position the fabric under the presser foot, aligning the starting point with the marked location on the buttonhole guide plate․
Lower the presser foot and begin sewing․ The machine will automatically stitch the first side of the buttonhole․ Stop when it signals, lift the presser foot, rotate the fabric 90 degrees, lower the foot again, and continue sewing the next side․ Repeat this process for all four sides․
Finally, carefully cut open the buttonhole using the buttonhole opener (often included with the machine) or small, sharp scissors․ Be cautious not to cut the stitching․ Practice on scrap fabric to perfect your technique before working on your final project․
Zipper Insertion: A Detailed Guide
Inserting a zipper with the Brother LS2125i requires precision․ Begin by attaching the zipper foot to your machine․ Position the zipper face down, centered under the presser foot, with the zipper teeth slightly to the right․
Start sewing close to the zipper teeth, using a straight stitch․ Maintain a consistent seam allowance․ Backstitch at the beginning and end to secure the zipper․ Repeat on the other side of the zipper tape․
For an invisible zipper, use the invisible zipper foot․ Align the zipper coils with the guide on the foot and sew slowly, ensuring the coils are caught with each stitch․
When inserting a standard zipper into a seam, press the seam open after sewing each side․ Carefully understitch the seam allowances to prevent them from rolling to the right side․ Practice on scrap fabric to achieve a professional finish․
Using Optional Presser Feet
The Brother LS2125i’s versatility expands with optional presser feet․ A zipper foot simplifies zipper insertion, allowing close stitching to the teeth․ The buttonhole foot automates buttonhole creation, ensuring consistent size and shape․
An overcasting foot finishes raw edges, preventing fraying․ A blind hem foot creates nearly invisible hems, ideal for skirts and trousers․ The quilting foot aids in even stitch distribution for quilting projects․
To change feet, loosen the screw on the presser foot holder and gently remove the existing foot․ Align the new foot under the holder and tighten the screw securely․ Ensure the foot is properly attached before sewing․
Refer to your manual for a complete list of compatible presser feet and their specific applications․ Utilizing the correct foot enhances sewing precision and expands creative possibilities․
Maintenance and Troubleshooting
Regular cleaning and oiling ensure optimal performance․ Troubleshooting guides address common issues like threading problems and stitch imperfections, extending the machine’s lifespan․
Cleaning the Machine: Removing Lint and Dust
Consistent cleaning is vital for maintaining your Brother LS2125i’s performance and longevity․ Lint and dust accumulation within the machine can cause threading issues, skipped stitches, and even mechanical failures․ Always power off and unplug the machine before commencing any cleaning procedures for safety․
Use a soft brush, often included with the machine, to gently remove lint from the bobbin area, feed dogs, and around the needle plate․ A small vacuum cleaner with a brush attachment can also be effective, but use caution to avoid damaging delicate components․ Pay close attention to the bobbin case and surrounding areas, as lint tends to gather there․
For hard-to-reach areas, a cotton swab dipped in rubbing alcohol can be used to carefully clean away debris․ Avoid using harsh chemicals or abrasive cleaners, as these can damage the machine’s finish or internal parts․ Regularly cleaning after each use, or at least frequently, will prevent significant buildup and ensure smooth operation․
Oil Points and Lubrication
Proper lubrication is crucial for the smooth operation of your Brother LS2125i․ Refer to your manual for specific oiling points, as incorrect lubrication can cause damage․ Generally, key areas include the bobbin race, hook assembly, and any moving parts identified in the diagram within the manual․
Use only sewing machine oil – never use oil intended for other purposes․ Apply oil sparingly, using an oiler or a small brush, to avoid over-lubrication which can attract dust and create a sticky residue․ Wipe away any excess oil immediately after application․
Regular oiling, typically every few hours of use or as recommended in the manual, will help maintain optimal performance and prevent wear and tear․ Avoid oiling the feed dogs or tension discs, as this can affect their function․ Consistent maintenance, including proper lubrication, extends the life of your machine․
Troubleshooting Common Problems: Threading Issues
Threading problems are frequent with new users․ Ensure the presser foot is up when threading, as this releases tension․ Verify the thread is correctly seated in the tension discs and guided through all threading points, following the manual’s diagram precisely․ Incorrect threading is the most common cause of issues․
If the upper thread breaks, re-thread both the upper thread and bobbin, checking for knots or damage․ A poorly wound bobbin can also cause problems; rewind it evenly․ Clean the threading path of lint and dust, as obstructions can impede thread flow․
If the bobbin thread bunches, ensure the bobbin is inserted correctly and the thread is flowing smoothly․ Consult the manual’s troubleshooting section for specific diagrams and solutions․ Always use quality thread appropriate for your fabric type․
Troubleshooting Common Problems: Stitching Issues
Skipped stitches often indicate a bent or dull needle; replace it with a new one of the correct size and type for your fabric․ Incorrect threading or improper tension can also cause skipped stitches – re-thread and adjust tension settings․ Ensure the presser foot is firmly down during sewing, as this engages the feed dogs․
Uneven stitches may result from inconsistent fabric feeding․ Check the feed dogs for debris and clean them if necessary․ Adjust stitch length according to your fabric weight; shorter stitches are better for lighter fabrics․ Incorrect tension can lead to looping or puckering․
Fabric puckering suggests the tension is too tight․ Loosen the upper tension slightly and test sew․ Refer to the manual’s tension guide for recommended settings․ Always test on a scrap fabric before sewing your project․

Safety Precautions and Manual Information
Always prioritize safety when operating the LS2125i․ Consult the manual for crucial guidelines, and locate the digital PDF online for comprehensive support and parts details․
Safety Guidelines for Operation
Prior to operating your Brother LS2125i, carefully review all safety precautions detailed within the instruction manual․ Always disconnect the power supply when threading, changing the needle, or performing any maintenance․ Never operate the machine with damaged parts, and ensure all screws are tightened securely․
Keep fingers away from moving parts, particularly the needle and presser foot, during operation․ Do not use excessive force when sewing, allowing the machine to feed the fabric naturally․ Avoid sewing over pins or thick materials, as this can damage the needle and machine․ Always use the recommended accessories specified in the manual to prevent malfunctions or injuries․
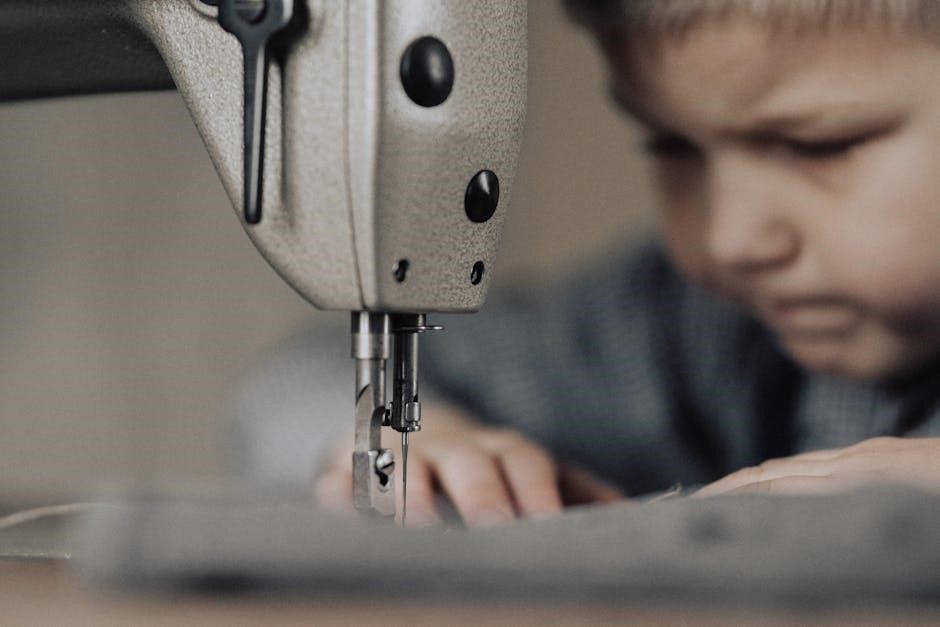
Supervise children closely when the machine is in use, and store it in a safe location out of their reach․ Regularly inspect the power cord for damage, and replace it if necessary․ Never attempt to repair the machine yourself; contact a qualified technician for assistance․ Follow these guidelines to ensure safe and enjoyable sewing experiences with your Brother LS2125i․
Understanding the Manual: Key Sections
The Brother LS2125i manual is structured to guide users from initial setup to advanced techniques․ Key sections include detailed threading diagrams for both upper thread and the bobbin, crucial for proper stitch formation․ Pay close attention to the stitch selection guide, outlining various stitch types and their applications․
The manual thoroughly explains adjustments for stitch length and width, enabling customized sewing․ Dedicated chapters cover specialized operations like buttonhole sewing and zipper insertion, providing step-by-step instructions․ Maintenance sections detail cleaning procedures and lubrication points, ensuring longevity․
Troubleshooting guides address common issues like threading problems and stitching irregularities․ Familiarize yourself with the parts list for easy identification when ordering replacements․ The manual also includes warranty information and support contact details․ Utilizing these sections will maximize your sewing experience․
Locating the Digital Manual (PDF) Online
Finding the Brother LS2125i manual online is straightforward․ Numerous websites host the PDF version, offering convenient access without the need for a physical copy․ A quick internet search using “Brother LS2125i manual PDF” yields several results, including manufacturer-supported links and third-party resources․
Many sewing machine parts and accessory retailers also provide downloadable manuals for customer support․ Check official Brother support websites for the most up-to-date version and potential language options․ Ensure the PDF is legitimate and complete, containing all 72 pages of detailed instructions․
Downloading the digital manual allows for easy searching, printing specific sections, and viewing on various devices․ Having a digital copy is particularly useful when traveling or needing quick reference during a project․ Remember to save the file to a secure location for future access․
Finding Parts and Accessories
Locating replacement parts and accessories for the Brother LS2125i is easily achievable through various online and offline channels․ Specialized sewing machine parts retailers offer a wide selection, including needles, bobbins, presser feet, and more․ The Brother website itself often lists compatible accessories and provides links to authorized dealers․
Online marketplaces like eBay and Amazon also feature numerous listings for Brother LS2125i parts, both new and used․ When purchasing, verify the part number to ensure compatibility․ Genuine Brother accessories are recommended for optimal performance and longevity․
Consider exploring options like accessory feet for specialized tasks, enhancing the machine’s versatility․ Always refer to the manual for recommended accessories and proper installation procedures․ Maintaining a supply of essential parts ensures uninterrupted sewing enjoyment․
Warranty Information and Support
Brother offers a limited warranty on the LS2125i sewing machine, typically covering manufacturing defects for a specified period, often one year from the date of purchase․ Review the warranty card included with your machine or consult the digital manual for precise terms and conditions․ Registering your machine online can streamline the warranty claim process․
For technical support, Brother provides a comprehensive online knowledge base with FAQs, troubleshooting guides, and downloadable resources․ Their customer service team is accessible via phone or email, offering assistance with operational issues and repairs․ Authorized Brother service centers are available for more complex repairs requiring professional attention․
Keep your proof of purchase readily available for warranty claims․ Brother’s support network aims to ensure a positive ownership experience with your LS2125i sewing machine․